Screen-printed transfers, DTF and UV DTF stickers for your professional textiles and objects



What is printable flex?
Printable flex is a printing technique that allows you to customise a wide range of supports such as textiles, caps, luggage and more.
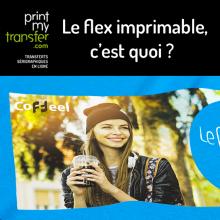
Used primarily for textile branding, flex is a type of smooth transfer film, supplied on a roll, which can be professionally printed using a Solvent / Eco-Solvent printer. Once the design is printed, the flex is cut using a cutting plotter (contouring) and then applied hot to a support using a heat press.
Printable flex can be in any colour, glossy, glittery, textured, velvet (flock)… something for every taste!
It is a technique better suited to small quantities and for printing multi-colour designs, such as photos. This technique ensures excellent graphic fidelity to the original artwork.
How does printable flex work?
Step 1: Preparation
The first step is to load the flex roll into the printer. At the same time, you need to retrieve or create a design using design software (Photoshop, Illustrator, etc.).
Step 2: Printing
Once ready, start printing the design.
Step 3: Cutting
Once printing is complete, the design must be contour-cut. To cut the flex, we generally use a cutting plotter (a computer-controlled sheet or roll cutting machine). If you do not have a cutting plotter, it is also possible to cut it with scissors.
Step 4: Marking on textile using a heat press
Everything is now ready for marking on textile! To do this, you will need a heat press. On the lower part of the press, first place the textile to be customised, then the printable flex on top of it.
Now lower the upper part of the press and let it heat for approximately 15 seconds at 150°C (adjust temperature and time according to the product’s technical data sheet).
Remove the carrier polyester film after pressing and you are done!
Printable flex: Advantages
The main advantages of printable flex are as follows:
- Excellent colour rendering: vivid colours stand out
- Customisation possible on small quantities
- Allows printing of special colours and effects (velvet, fluo, etc.)
- Wash resistance is quite good and durable
Printable flex: Disadvantages
Printable flex also has a few disadvantages:
- The design must be simple
- Low durability over time
- Time-consuming to implement, weeding can be laborious
There you have it: you now know the fundamentals of printable flex!
And if like us, your heart leans towards screen-printed transfers for customising your textiles (ease of use, high quality, beautiful finish), head over here!